
Step into a world of watercolor forests, rickety clocktowers, and talking squirrels. The Adventures of Elliot Grandtree is a point-and-click adventure that trusts you to solve its riddles without hand-holding. Whether you’re stuck on the well riddle, lost in the Whispering Caverns, or hunting the last memory orb, this guide will light the way, no hand-holding, just clear steps. From the first click to the final cutscene, here is everything you need to conquer every puzzle, collect every memory orb, and claim that elusive 100% completion.
Getting Started, Controls, Mechanics, and Early Hints
Before Elliot takes his first step, it pays to understand the tools at your disposal. The interface is classic point-and-click: a single left click to walk and interact, a right click to examine an object in detail, and an inventory bar at the bottom of the screen. You can combine items by dragging one onto another in the inventory, a feature you will use heavily once you find a rusty key and a jar of bees.
The Opening Sequence
You begin inside Elliot’s cozy home. Examine the bookshelf for a faded letter, then open the drawer beside the bed to find a pocketknife. Go downstairs, talk to your grandmother, and grab the apple from the kitchen counter. That apple is critical, do not eat it. Outside, a crow sits atop the fence. Give the crow the apple, and it will drop a small brass key. Use the key on the garden shed to access a pair of garden shears. With the shears, cut the ivy blocking the back gate. Welcome to the Enchanted Forest.
Essential Tips
- Save often. The game has no autosave; only manual saves at specific checkpoints.
- Talk to every character at least twice. Dialogue often changes after you complete a nearby puzzle.
- Examine everything. A seemingly useless item like a “broken compass” can later be combined with a magnet found three chapters later.
- The hint system is limited. You get only three hint tokens for the entire playthrough. Use them only on puzzles with no alternative solutions, like the star mirror alignment.
Main Quest Walkthrough, All Chapters and Puzzles Solved
Chapter 1, The Lost Locket
Elliot’s first major task is retrieving his grandmother’s locket from the old well. But the well is locked, and the key is guarded by a riddle.
Step 1: In the garden, find the sundial. The shadow points to “III” (3 o’clock). Enter 3 on the stone panel beside the well. A compartment opens with a wooden plank.
Step 2: Combine the wooden plank with the rope you found on the scarecrow. This creates a long pole.
Step 3: Use the pole to fish the locket out of the well. Do not drop the pole in the water, you will need it later for the Skyward Tower.
Step 4: Return the locket to your grandmother to unlock the path to the Whispering Caverns.
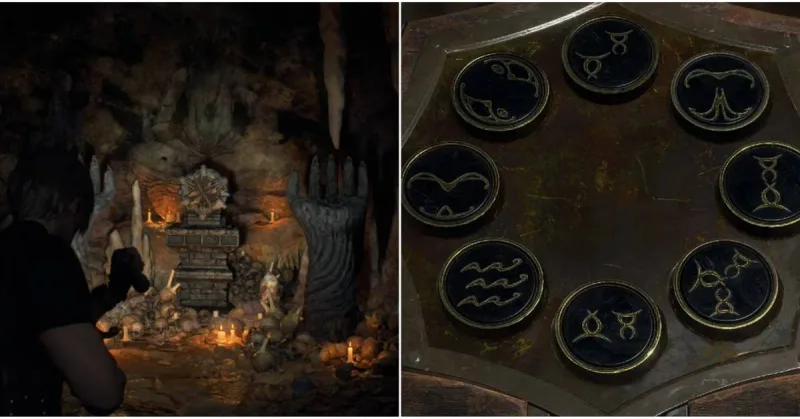
Chapter 2, The Whispering Caverns
The caverns are a dark maze lit only by bioluminescent mushrooms. Each mushroom emits a color (red, blue, green). You must light three braziers in a specific order.
Puzzle solution: Examine the mural on the cavern wall. It shows a sequence of symbols: a sun, a moon, a star. Light the braziers in that order: first the brazier nearest the red mushrooms (sun), then the blue mushrooms (moon), then the green mushrooms (star). A hidden door opens, revealing the second ancient artifact, the Crystal Heart.
Caution: The caverns have a few dead ends. Stick to the left wall to quickly navigate, but remember that some collectibles are hidden in right-side alcoves.
Chapter 3, The Skyward Tower
This chapter is the game’s most complex puzzle chain. You must operate a clockwork mechanism, align star mirrors, and defeat a guardian.
Clockwork mechanism: Inside the tower, you find three gears. Place them in the slots labeled with the numbers 5, 9, and 12, these correspond to the positions of the tower’s outer clock face. Once the gears engage, a telescope emerges.
Star mirrors: Use the telescope to view the night sky. The star pattern you see (a triangle with a bright star at the center) must be replicated by rotating three mirrors on the top floor. Rotate Mirror A to 45 degrees, Mirror B to 90 degrees, Mirror C to 135 degrees. A beam of light will strike the crystal at the peak.
Guardian fight: The Crystal Golem awakens. You cannot hurt it directly. Instead, use the long pole from Chapter 1 to pry the ruby from its chest. Then, throw the ruby into the brazier on the left. The golem shatters. Collect the third artifact, the Star Fragment.
Chapter 4, The Final Confrontation
Back in the village, the great tree is dying. You must combine the three artifacts: the Crystal Heart, the Star Fragment, and the Enchanted Acorn (found in Chapter 2 inside a hidden hollow). Place them in the three slots at the base of the tree. A door opens, revealing a chamber with a riddle.
Riddle: “The one who seeks the sun must first embrace the night. The one who finds the moon must first lose all light.” The answer is to extinguish all torches in the chamber (use your pocketknife to cut the rope holding the candelabras). After the darkness, pour a vial of glowing mushroom water (collected in Chapter 2) onto the tree roots. The tree blooms, and the village is saved.
Secrets and Collectibles, 100% Completion Guide
For completionists, Elliot Grandtree hides 15 memory orbs (blue spheres) and 10 golden acorns. Collecting all of them unlocks two of the game’s rarest achievements. Below is a complete list of every orb and acorn, with location descriptions to help you track them down.
Memory Orbs (15 total)
- Garden, Behind the well after solving the sundial puzzle.
- Grandmother’s House, Inside the grandfather clock (examine it after Chapter 1).
- Whispering Caverns, Entrance, On a stalagmite to the left of the first brazier.
- Whispering Caverns, Right Alcove, Behind a rock near the blue mushrooms.
- Whispering Caverns, Braziers Room, Appears after lighting all three braziers, floating above the central altar.
- Whispering Caverns, Secret Room, Use the pocketknife on a crack in the floor in the right alcove; orb inside.
- Skyward Tower, Ground Floor, Behind the telescope after the star mirror puzzle.
- Skyward Tower, Top Floor, On the ledge outside (accessible after defeating the golem).
- Skyward Tower, Clock Room, Inside one of the gear slots (check after placing the 5-gear).
- Village, Well, Return to the garden well after Chapter 3; orb floats above it.
- Village, Mushroom Farmer’s Hut, On the shelf after completing his side quest.
- Village, Musician’s Stage, Under the stage after you give him the sheet music.
- Village, Tree Base, Behind the left root after pouring the mushroom water.
- Final Chamber, On the pedestal after the riddle (must pick up before cutscene).
- Epilogue, Appears in Elliot’s bedroom after the credits; revisit the starting house.
Golden Acorns (10 total)
- Garden, Kick the scarecrow three times (it falls over, acorn underneath).
- Whispering Caverns, Left Path, In a hollow stump near the dead end.
- Whispering Caverns, Right Alcove, Trade the glowing mushroom (to the mushroom farmer) for a key, then open the chest.
- Skyward Tower, Exterior, On a gargoyle’s tongue (use the long pole to knock it down).
- Village, Square, After giving the musician his lost sheet music, he plays a tune that makes a squirrel drop the acorn from a rooftop.
- Village, Bakery, Solve the oven puzzle (push the correct tiles) to open a secret drawer.
- Village, Well Area, Throw the rusty key into the well after Chapter 1; the acorn floats up.
- Final Chamber, Behind the candelabra after cutting the rope.
- Epilogue, Check the mailbox outside Elliot’s house after the credits.
- Hidden Room, Behind the painting in Elliot’s house (interact three times); acorn on the desk.
Hidden Achievements
- “Master Explorer”, Find all 15 memory orbs.
- “No Hints Needed”, Complete the game without using any hint tokens. The game tracks this, so do not even click on the hint button.
- “Speedrunner”, Finish the game in under 2 hours. Skip dialogue (hold the action button while talking) and avoid backtracking. Best attempted on a second playthrough.
Easter Eggs
Behind the painting in Elliot’s house (interact with it three times) is a hidden room containing a note from the developer. You can find a secret underground room in the Whispering Caverns by using the pocketknife on a small crack in the floor. Inside is a statue that plays a retro 8-bit version of the game’s theme.
Advanced Tips and Troubleshooting
Even with a guide, you may hit a wall. Here are the most common pitfalls and how to avoid them.
- Missing a tiny item. The rusty key in the opening sequence is easy to miss. It falls behind the fence post when the crow drops it. Make sure you click on the ground near the fence.
- Wrong order of dialogue. Some side quests lock if you talk to characters in the wrong order. The mushroom farmer will not give you the shovel until you have first talked to the musician. Always exhaust all dialogue with everyone in a new area.
- Skip animations. Hold down the action button (controller: X on Xbox, Square on PlayStation; keyboard: spacebar) to trim travel and object animations.
- Use the hint system sparingly. You have only three hint tokens for the entire game. Save them for the Skyward Tower’s star mirror alignment, that puzzle has the most specific inputs and no second chances.
As for side quests, tackle the mushroom farmer’s request first (he gives you a mushroom that can be traded for the musician’s sheet music). The sheet music quest itself yields a golden acorn, which is needed for 100% completion.
The Joy of a Puzzle Solved Right
Elliot’s journey rewards every patient click. Whether you’re chasing the “Master Explorer” achievement or just wanted to see the tree bloom, you’ve earned that ending. The puzzles ask for logic, observation, and a touch of patience, and now you have the tools to conquer them all. Now go save that village, and remember, the apple was never meant for eating.


Comments
Join the Conversation
Share your thoughts, ask questions, and connect with other community members.
No comments yet
Be the first to share your thoughts!